Cloudflare Turnstile Setup
This tutorial guides you through the process of configuring Cloudflare Turnstile keys for use in your customized panel.
⚠️ Important: Turnstile keys are only used when your custom domain is verified.
Prerequisites
- Cloudflare account
- Domain configured in Cloudflare
- Access to “Panel Customization” section in the panel
Step 1: Access Cloudflare Turnstile
- Log in to your Cloudflare account
- Navigate to the “Turnstile” section in the sidebar menu
- Click “Add Widget” or “Turnstile widget” to create a new widget
Step 2: Configure the Turnstile Widget
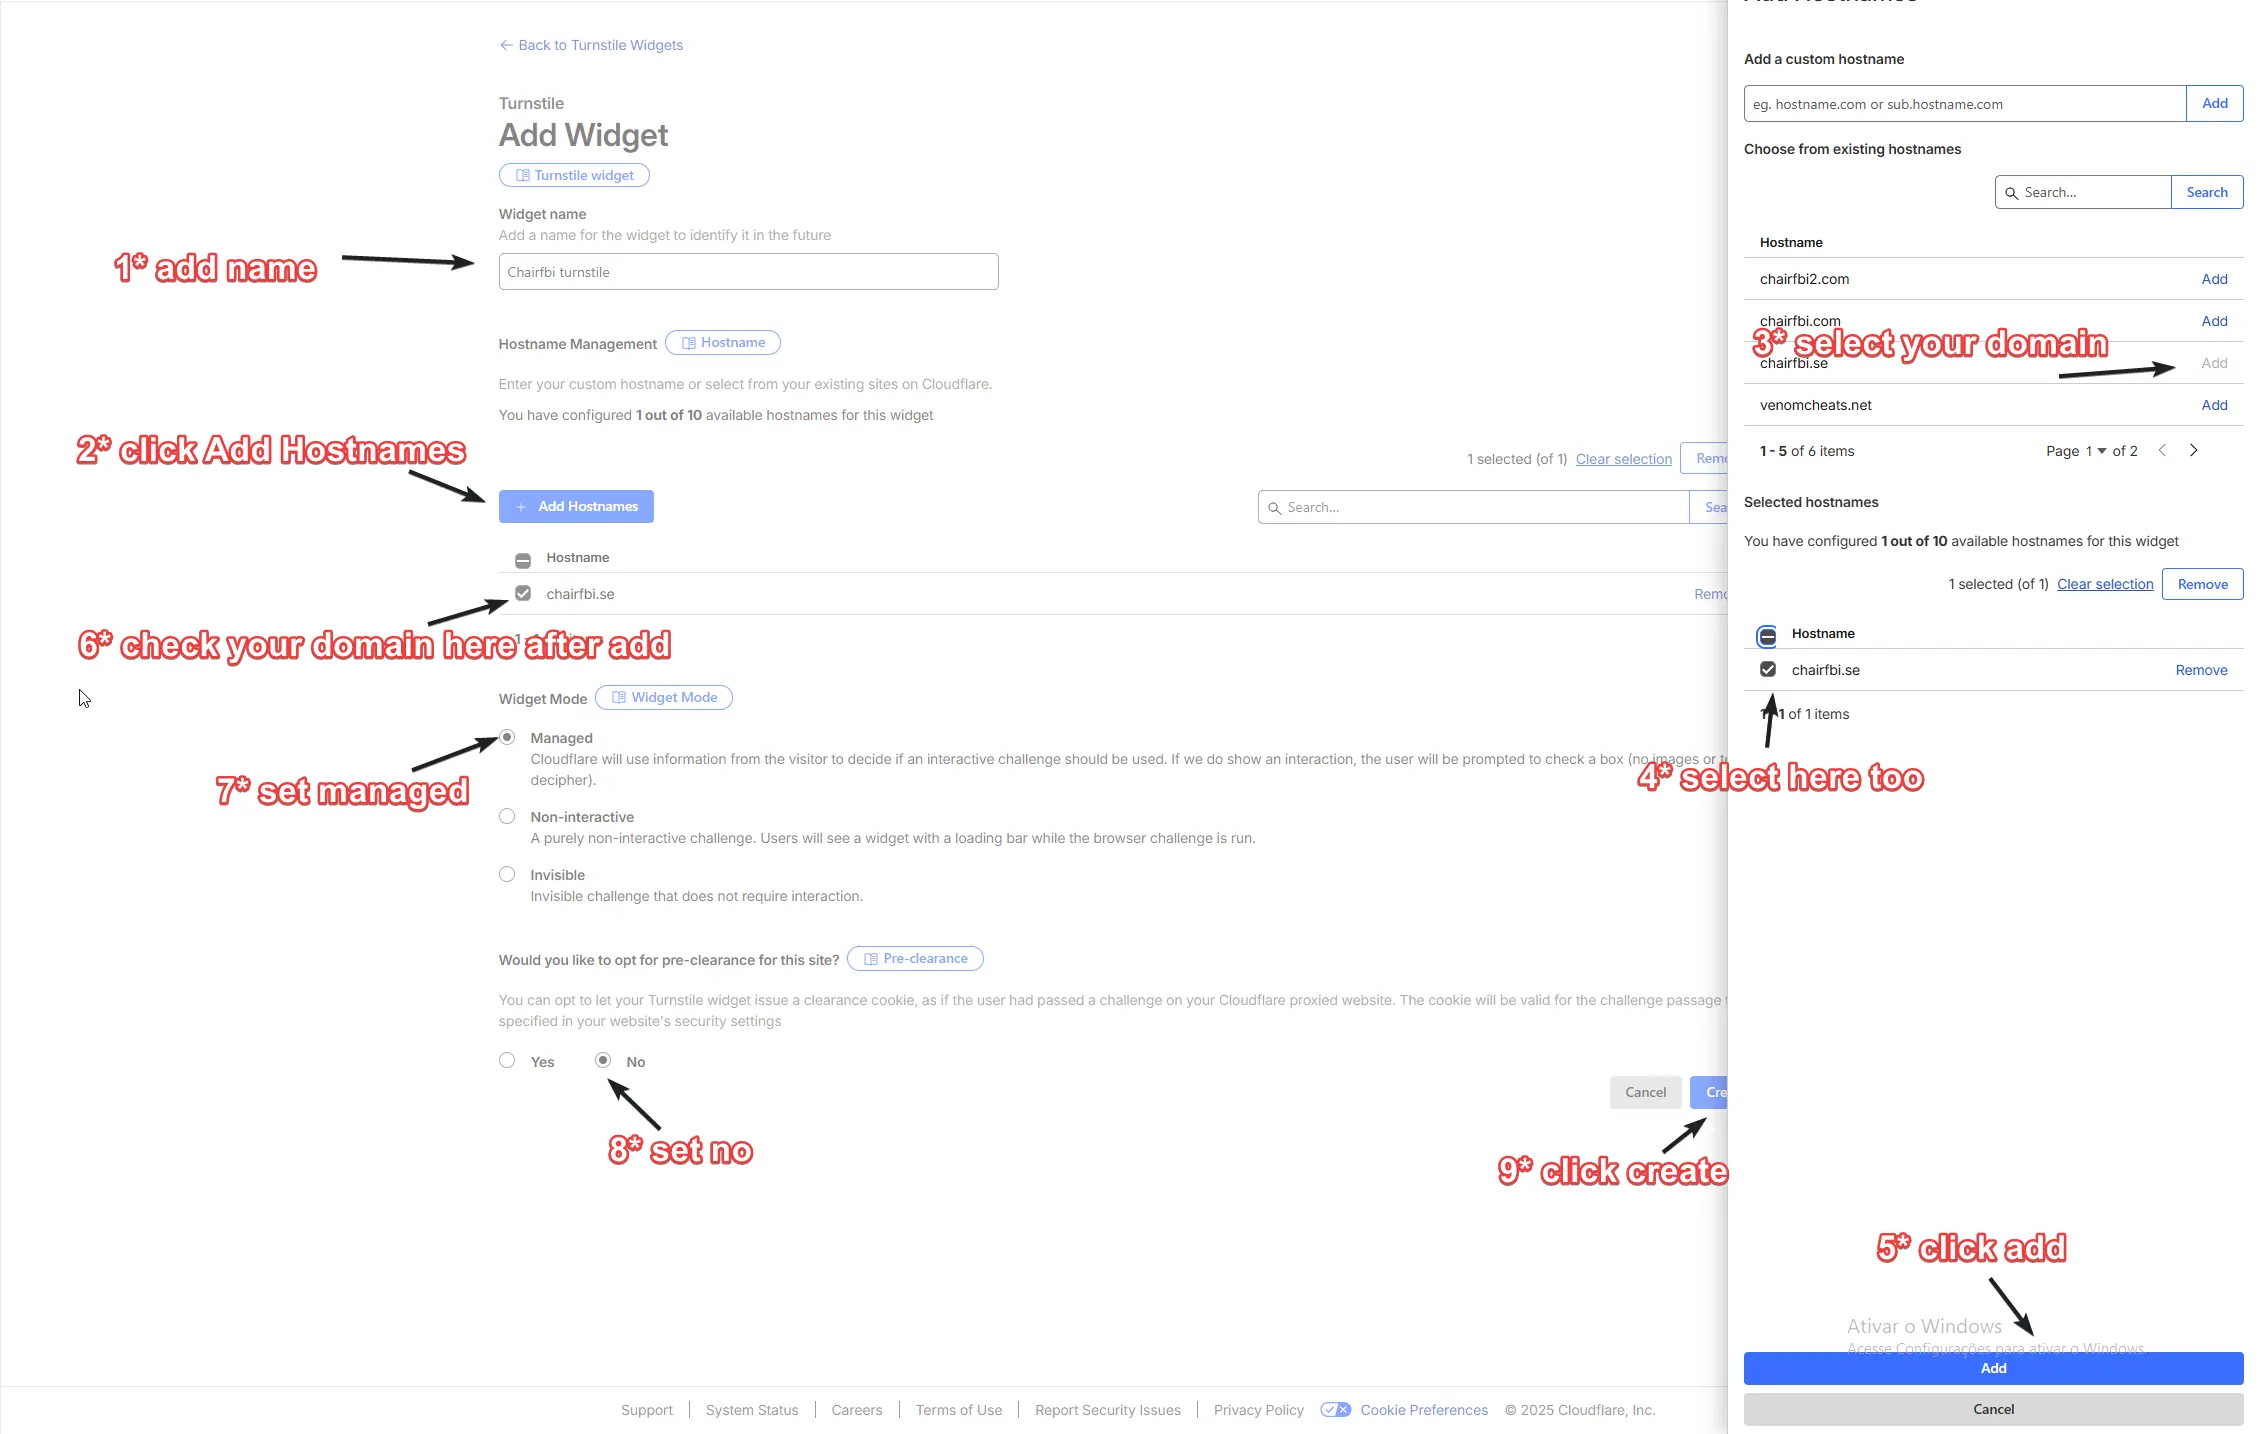
2.1. Widget Name
- In the “Widget name” field, add a name to identify the widget in the future
- Example: “Chairfbi turnstile”
2.2. Hostname Management
- Click the ”+ Add Hostnames” button
- In the window that opens, you can:
- Add a custom hostname: type the domain in the field and click “Add”
- Choose from existing hostnames: select your domain from the list (e.g., “chairfbi.se”)
- After selecting the domain, click the checkbox to confirm the selection
- Click the “Add” button at the bottom of the window
- Verify that your domain appears in the list of selected hostnames
2.3. Widget Mode
Select “Managed” as the widget mode. This option allows Cloudflare to use visitor information to decide if an interactive challenge should be used. If it shows an interaction, the user will be prompted to check a box (no images or deciphering).
2.4. Pre-clearance
Select “No” for pre-clearance. This option does not use pre-clearance for the Turnstile widget.
2.5. Create Widget
- Review all settings
- Click the “Create” button to create the widget
Step 3: Get the Keys
After successfully creating the widget, you will see a confirmation page with your keys:
3.1. Site Key (Public Key)
- The Site Key (also called Public Key) is displayed in a text field
- Click “Click to copy” to copy the key
- This is the key you will add to the “Public Key (Site Key)” field in the panel
3.2. Secret Key
- The Secret Key is displayed in a text field
- Click “Click to copy” to copy the key
- This is the key you will add to the “Secret Key” field in the panel
⚠️ Note: You will be able to view your keys again later, but it is recommended to save them in a secure location.
Step 4: Configure in Panel Customization
- Access “Panel Customization” in your panel’s sidebar menu
- Navigate to the “Security” tab (or the Turnstile section)
- Locate the “Cloudflare Turnstile” section
4.1. Add Public Key (Site Key)
- In the “Public Key (Site Key)” field, paste the public key you copied from Cloudflare
- This key is displayed in the Turnstile widget
4.2. Add Secret Key
- In the “Secret Key” field, paste the secret key you copied from Cloudflare
- Use the eye icon to toggle key visibility and verify it is correct
- Keep this key secret - it is used for server-side validation
4.3. Save Changes
- After filling both fields, click “Save Changes” in the top right corner
- Changes will be applied immediately
How It Works
- When domain is verified: Custom Turnstile keys are used for captcha verification on login pages when accessed via your custom domain
- When domain is not verified: The system uses default global keys
- Validation: The public key is used on the frontend (widget), while the secret key is used on the backend to validate the challenge
Verification
After configuring the keys:
- Access your login page through the custom domain
- Verify that the Turnstile widget appears correctly
- Test the login flow to ensure validation is working
Troubleshooting
Widget does not appear:
- Verify that the domain is verified in the panel
- Confirm that the keys were copied correctly (no extra spaces)
- Check if the hostname is configured correctly in Cloudflare
Validation fails:
- Confirm that the Secret Key is correct
- Verify that the domain in Cloudflare matches the domain configured in the panel
- Make sure you saved the changes in the panel
Additional Resources
- Cloudflare Turnstile Documentation
- For more information about integration, see the “Client side integration code” and “Server side integration code” links on the widget creation page in Cloudflare